Installing the Nexkey Solo
IMPORTANT NOTE
To prevent post-installation delays, the Nexkey system must be fully commissioned before installing the hardware. Please refer to this walkthrough demonstrating how to commission a new system via Nexkey’s Reseller Portal.

Kit Includes:
Nexkey Solo
Faceplate
2 Batteries
Mounting Screws
Deadlatch stop for mortise locks
Important Notes:
Door Closer Required With Solo install (to help prevent pre- load) along with the Solo.
Latch guard recommended if there is significant gap between door and Solo.
Extended Length Faceplates Plates are available upon request for Wood Frames.
Extended Length Goof Plates are available upon request.
Not intended for center hung doors.
Metal Frame Install Instructions
Recommended tools to bring:
Dremel w/ metal cutting wheel
Pliers
Metal file
Pencil
Power drill with philllips head bit
#1 phillips head screwdriver
Ruler
1. Remove strike plate
2. Mark Cutout
3. Cut front of frame
4. Remove material
5. Cutout dustbox, if needed
6. File down sharp edges
7. Install goof plate
8. Check fit
9. Install tab mounts, if needed
10. For cylindrical proceed to step 13
11. For mortise locks, check location of deadlatch
12. Install deadlatch stop
13. Test Solo and send digital keys to customer

Wood Frame Install Instructions
Recommended tools
Oscillating Tool with Plunge Cutter
Wood Chisel Set
VIX Drill BIT Set
Valve Paint Marker
Pencil
Ruler
Power Drill with Phillips head bit
#1 Phillips head screwdriver
1. Remove strike plate
2. Mark cutout with guide
3. Cutout frame with oscillating tool
4. Due to trim on door, mark and cutout for trim enhancer
5. Cutout tabs for Ssolo on wood studs (1/8” deep)
6. With self centering Vix Bit, drill pilot hole (prevents frame from cracking)
7. Dry fit and make adjustments as needed
8. If possible, add paint with Valve paint marker
9. Install Solo with mounting screws, shim Solo towards lock if needed)
10. Test Solo and send digital keys to customer
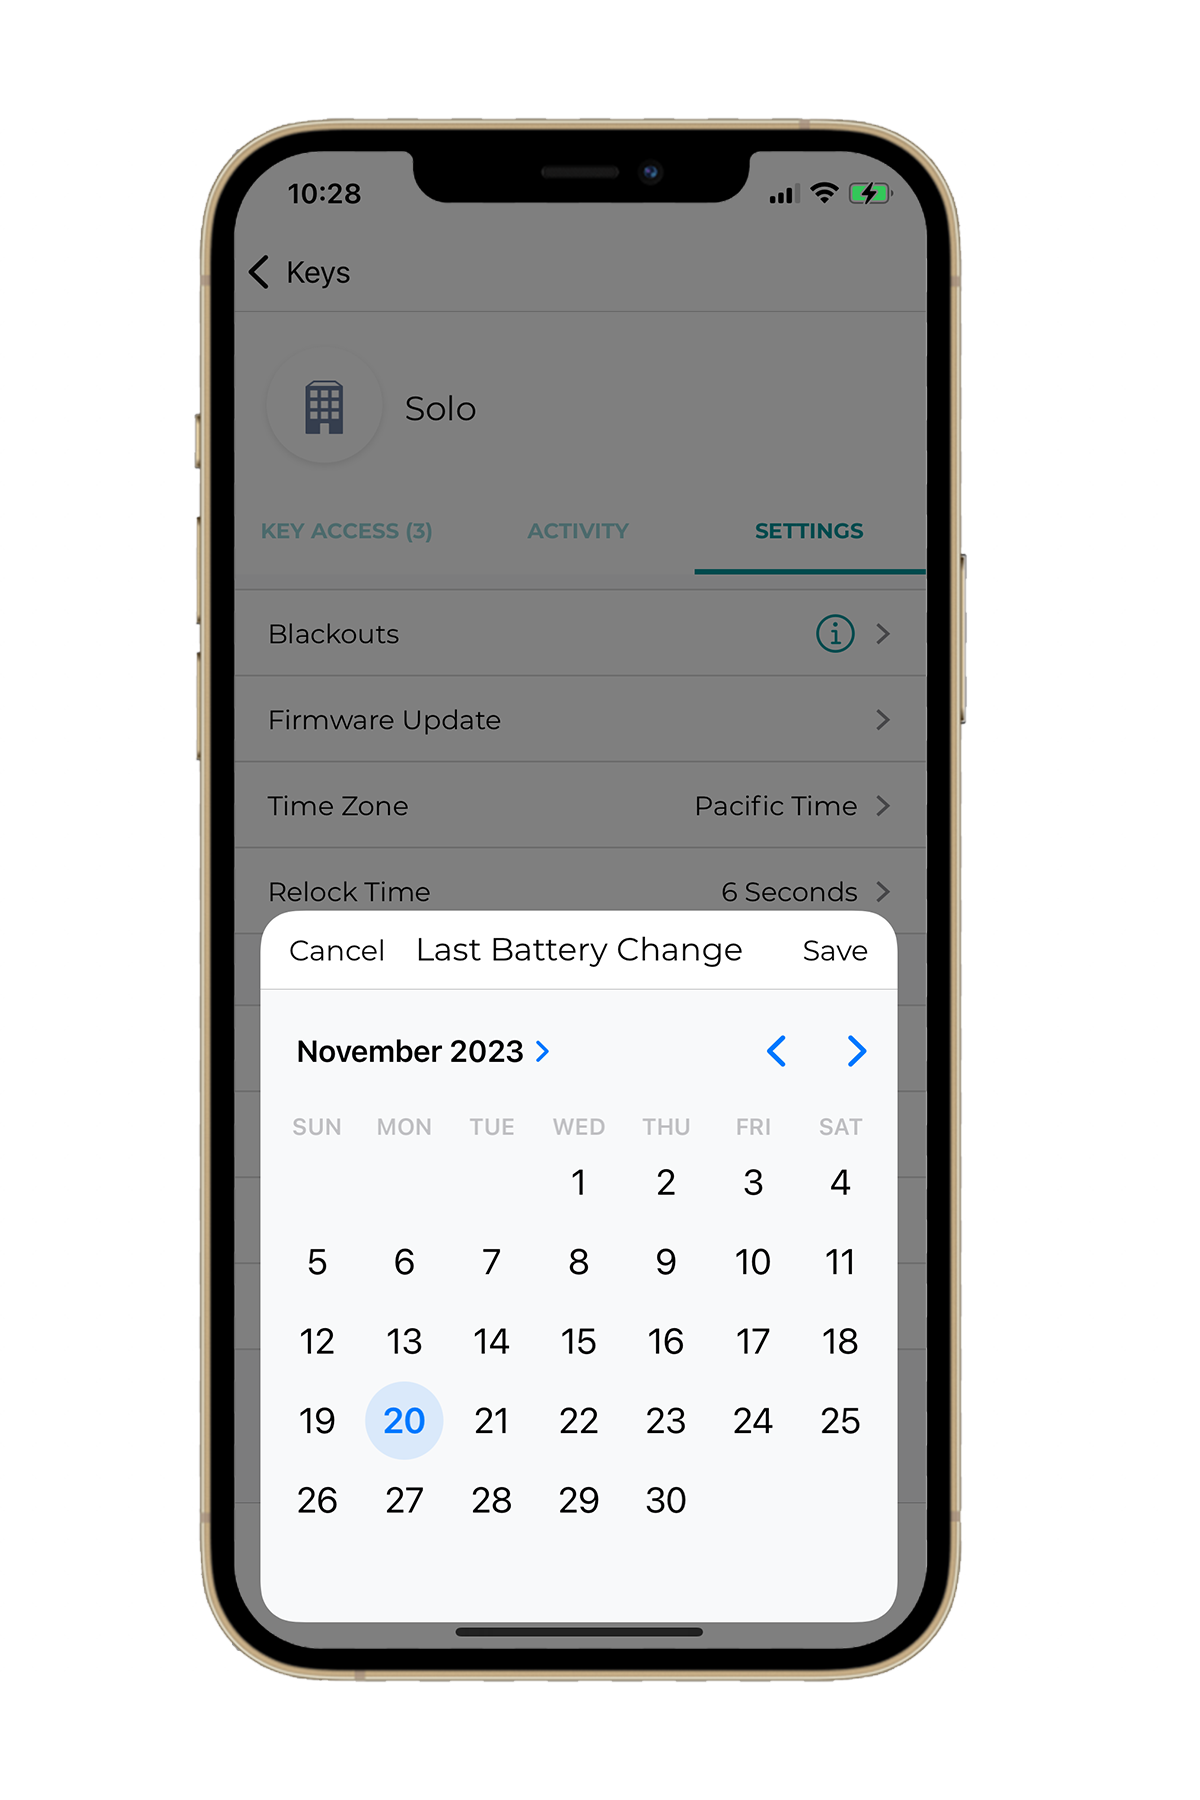
Update “Last Battery Change” Setting in the Nexkey App
By performing this step, Nexkey will send a email when it's time to replace the battery again.
Step 1. Select Keys tab
Step 2. Select the lock you just changed the battery in
Step 3. Select Settings and scroll down to the bottom
Step 4. Select Last Battery Change
Step 5. Select the day you installed the Solo